
Accessing Cisco CLI from the Console Port
Usually We Use SSH, but Sometimes You Just Have to Console On
So you just unboxed your fancy new Cisco switches and you need to begin the initial hardware setup and configuration. The console port is a great place to start. This quick guide will show you how to log on to your Cisco device by using the Console port.

The Console Port (Light Blue) – Image from Cisco.com
Typically, if your Cisco network devices are already configured and in production, you would want to access them remotely via SSH, configuration manager or controller. But what about those brand new, out of box, devices that aren’t configured for remote access yet? How about troubleshooting a device that you cannot access remotely? Console on to them and let the fun begin.
The first thing you will need is some sort of serial console cable. We like the USB to RJ45 serial cable which is cheap, convenient and widely available. Cisco typically includes a RJ-45-to-DB-9 adapter cable with the shipment of most devices, but we find the USB to RJ45 cable to be a more convenient alternative.
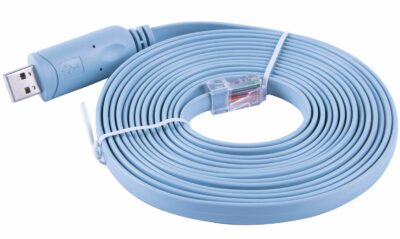
USB to RJ45 Console Cable – Image from Amazon.com
Plug your USB to RJ45 console cable into a USB port on your computer. You will now need to determine which COM port your computer is using. If you are using Windows 10, right click the Windows icon on the bottom left of your Desktop screen and launch “Device Manager.”
In Device Manager, locate the entry for “Ports (COM & LPT).” Expand it and you will see your serial cable communications port listed, for example “Communications Port (COM1),” would indicate your device is using COM1 for this cable. In the image below, the device is using COM Port 3.

Locate the COM Port Number in Device Manager
Now, launch your favorite terminal emulator software such as Putty, Terraterm, or SecureCRT. We will be using the free option, Putty, which can be downloaded here: https://www.putty.org/
Cisco uses the serial settings 9600 baud, 8 data bits, no parity, 1 stop bit, and no flow control, commonly referred to as 9600-8-N-1 or just 8-N-1. In the Putty settings, click “Serial” and confirm these are set correctly.
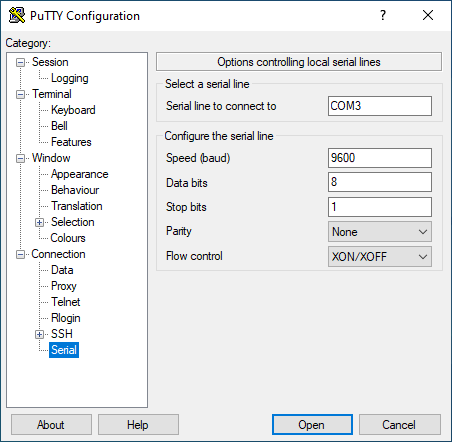
Configure the 9600-8-N-1 Settings Under “Serial”
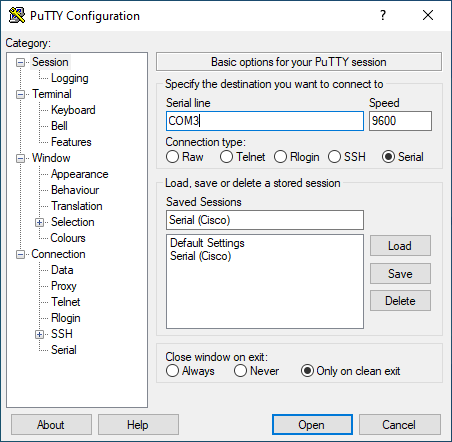
Save Your Connection Settings for Future Use
Back on “Session,” make sure your connection type is set to the Serial radio button. I like to go ahead and name this configuration something descriptive like “Serial (Cisco)” and save it. Connect the RJ45 side of your Console cable to the Cisco device’s console port. This port is typically located to one side on the front or back or your device and is marked in light blue.
Once both sides are connected and your terminal emulator software is configured to 8-N-1, click “Open” to begin your console session.