
How to Set up an LT2P VPN Service on the Ubiquiti Dream Machine Pro
Ubiquiti Dream Machine Pro has a Built in L2TP VPN Server that Works Great With the Windows Native VPN Client
The Ubiquiti Dream Machine Pro (UDM-Pro) is one of our favorite gateway appliances for small office, home office networks. It has a number of built in features including a Layer 2 Tunneling Protocol (L2TP) virtual private network (VPN) server that works with Windows native VPN client. This guide will go over setting up the VPN server and Windows client.
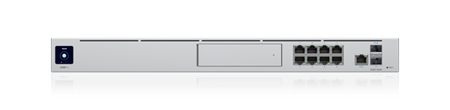
The Ubiquiti Dream Machine Pro, Image from https://store.ui.com
Step 1 – Set Up the VPN Server
NOTE: The screenshots in this guide are from Network v7.2.92.
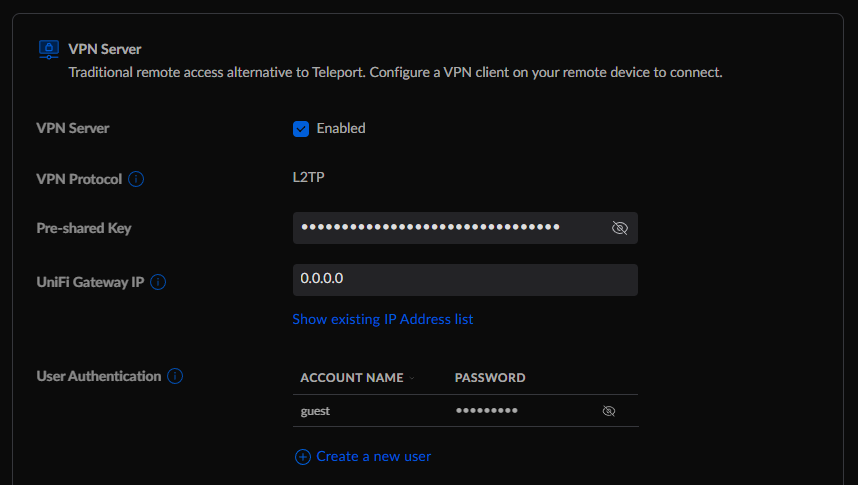
Log into your UDM-Pro by launching the Network Application from the Unifi OS, either directly or through the cloud service. Navigate to “Settings” (the cog icon) on the left hand side and then “Teleport & VPN.” Enable the server and use the following settings (adjust as needed for your specific application). You’ll also need to create at least one user for client access, we’ll use the username “guest” here.
VPN Server: Enabled
VPN Protocol: L2TP
Pre-shared Key: Use a Complex Passkey
UniFi Gateway IP: WAN1 (the public IP you UDM-Pro has on the WAN interface)
Advanced Configuration: Manual
Gateway/Subnet: Set a private gateway IP address and range
Require Strong Authentication: Enable
Enable the L2TP VPN Server on the UDM-Pro
The next step is to go ahead and toggle Advanced Configuration over to “Manual.” This will allow you to give your VPN a name, a gateway IP and range. The UDM-Pro will automatically do this for you, but we prefer the ability to manually set all of our IP ranges, including those for remote access services. In this case we’re using a 10.10.10.1 IP address for the gateway and a 255.255.255.0 (/24) subnet mask for the range. We’ll also want to go ahead and “Require Strong Authentication.”
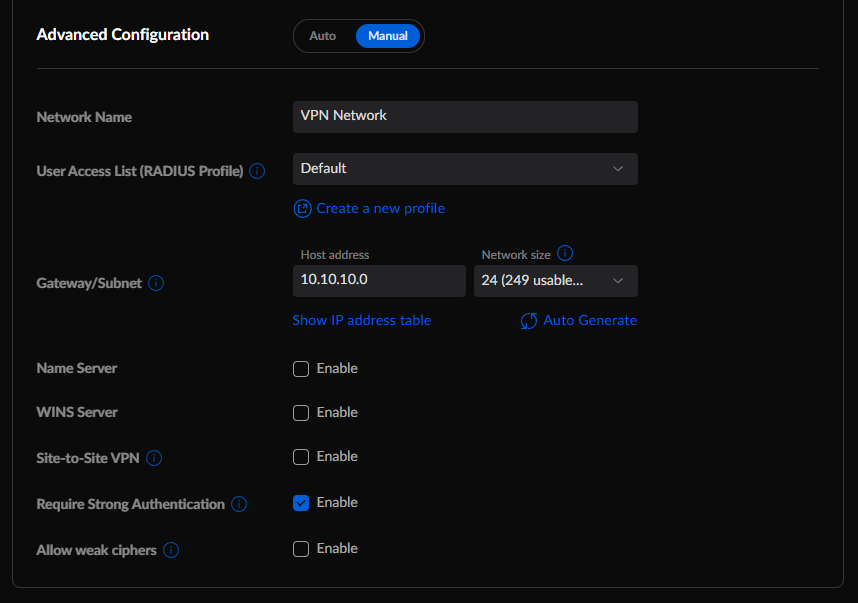
Toggle on the Manual VPN Configuration Settings
At this point your VPN server is set up and the next step is configure the VPN client in Windows.
Step 3 – Configure the VPN Client
Now that you have your VPN server running, it’s time to configure the VPN client. We’ll use the Windows 10 native L2TP client here.
If you do not have a static public IP address from your ISP, the Unifi Gateway IP setting in the VPN configuration may change. This will cause your VPN client to fail to connect when the IP address changes. To prevent this, we recommend setting up a DDNS service on the UDM-Pro before configuring the client.
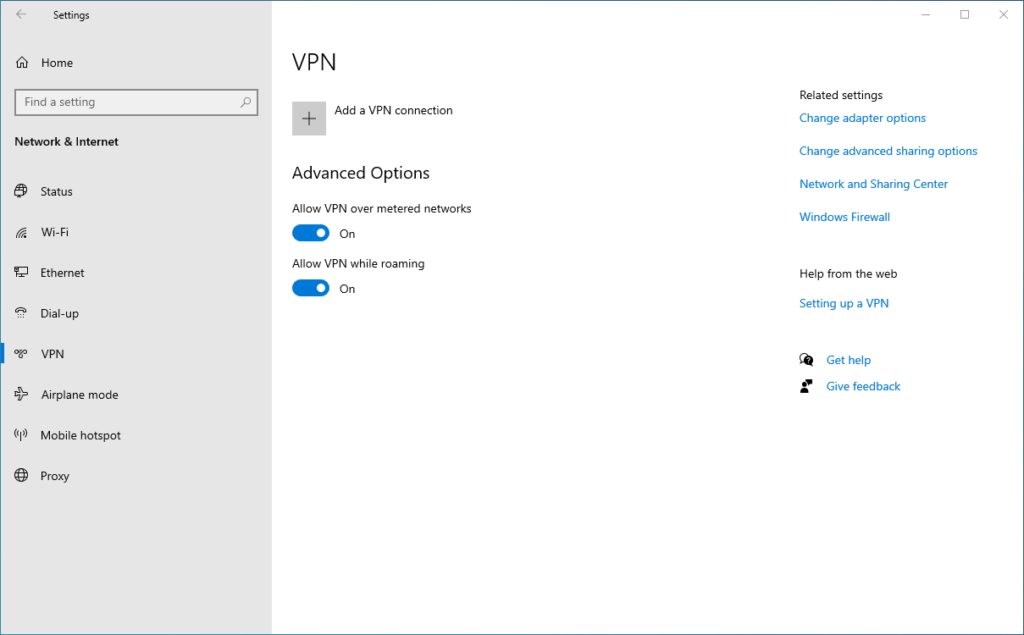
In Windows, navigate to Settings > Network & Internet > VPN. Click Add a VPN connection.
Add a VPN Profile Windows 10
This will open a dialog that will let you input all of the required information for your VPN client profile. You’ll want to use the following settings for the UDM-Pro L2TP VPN server.
VPN provider: Windows (built-in)
Connection name: This can be anything descriptive, we’ll use “UDM-Pro VPN”
Server name or address: Either the static IP address of the WAN interface on your UDM-Pro, or a DDNS hostname. We’ll use the DDNS hostname “ddns.atechdevs.com”
VPN Type: L2TP/IPsec with pre-shared key
Pre-shared key: Obtained from the UDM-Pro VPN server settings in Step-1
Type of sign-in info: User name and password
Username: Set on the UDM-Pro VPN server settings in Step-1
Password: Set on the UDM-Pro VPN server settings in Step-1
Remember my sign-in info: Enabled
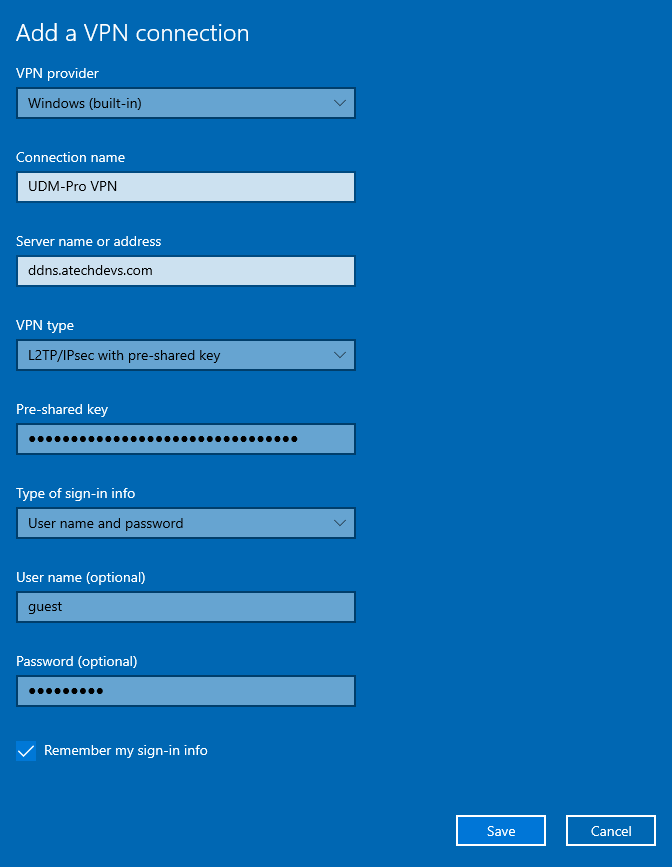
VPN Profile Settings for L2TP VPN on the UDM-Pro in Windows 10
Click save to create the VPN profile. You should now see the VPN connection if you click the network (Wi-Fi or Ethernet) icon in the lower right hand side of the Windows taskbar. While you are remote from your UDM-Pro network, click the profile name to connect to your L2TP VPN server on your UDM-Pro.
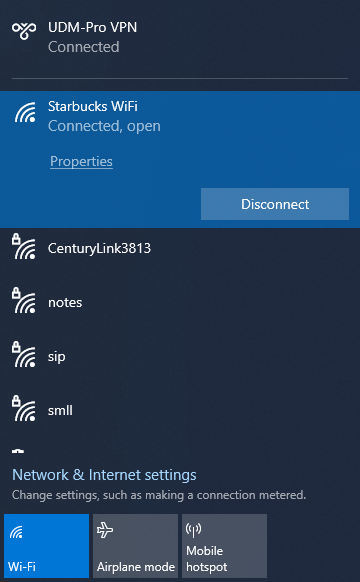
Windows native L2TP VPN client connected to the UDM-Pro VPN server
Additional documentation, including troubleshooting steps, can be found on the Ubiquiti UniFi website here.