
How to Install Windows 10 Using the Media Creation Tool
Do you need to install Windows 10 on your PC or virtual machine?
Windows 10 was originally released back in 2015 and despite the arrival of Windows 11 in 2021, it is still the most popular operating system on the market. There are many reasons why a user might want to install, or reinstall, a new copy of Windows 10. Perhaps you are building a new computer, or maybe your computer is running slow and you just want the performance of a clean operating system install. This guide takes a look at the Windows 10 Media Creation Tool, one of the fastest and easiest ways to manually install Windows 10.
Step 1 – Download and Install the Windows 10 Media Creation Tool
The first thing that you will need is a PC with internet access that you can use to download the Microsoft Windows 10 Media Creation Tool. You can find the download tool on Microsoft’s website: https://www.microsoft.com/en-us/software-download/windows10
There are specific instructions on this page that explain how to use the tool whether you are installing Windows 10 to the PC currently in use (considered an upgrade), or creating an installation media (USB) that you can use to install on another PC. Either way you will start by downloading and installing the software, and then selecting the options you want.
Download the Windows Media Creation Tool and install it on your PC. Accept the EULA and we recommend unchecking the “Use the recommended option for this PC” box so that you get the most options for installation. Uncheck it and select “Next”
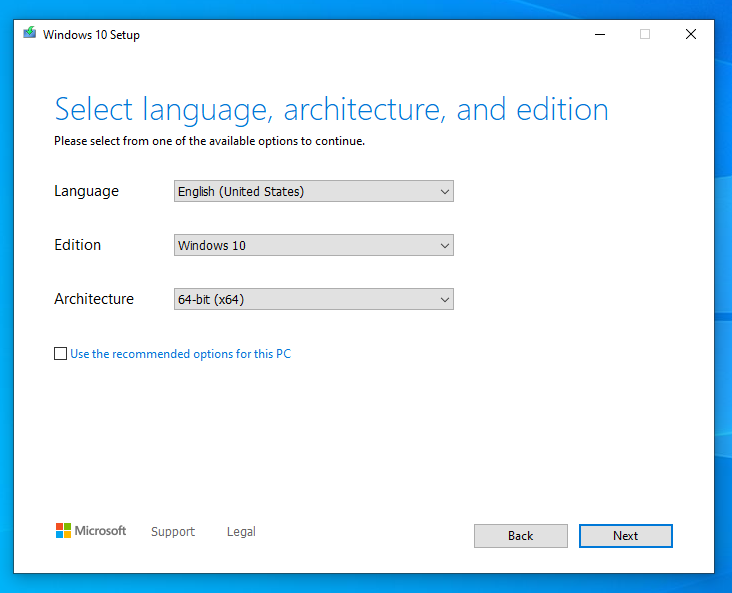
Uncheck “Use the recommended options for this PC”
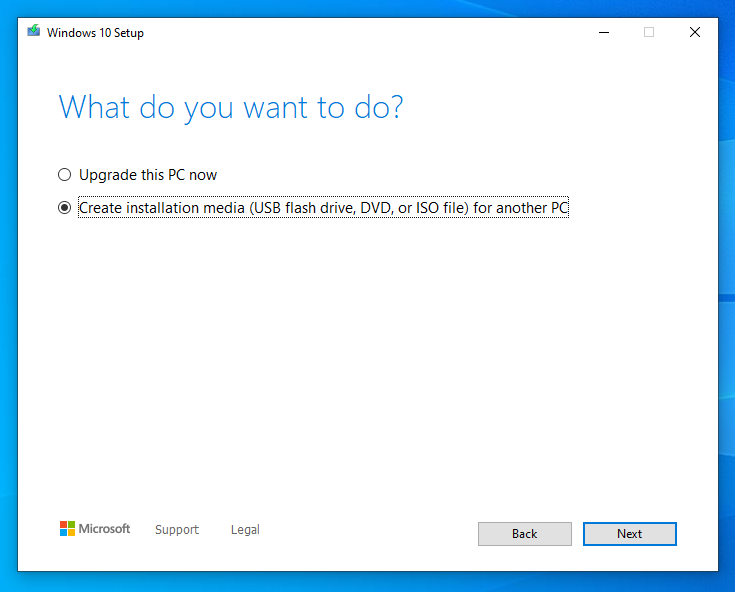
If you are upgrading the PC that you’ve used to install the Windows 10 Media Creation Tool, you would select “Upgrade this PC Now.” This is recommended if you are upgrading from an older version of Windows, but this guide will focus on creating the installation media. If you want to create a USB flash drive that you can re-use or use to install Windows 10 on another PC, select “Create Installation Media.”
- NOTE: If you select “Upgrade this PC Now,” you will be given the option to keep user files and data.
Step 2 – Create the Windows 10 Installation Media (USB Flash Drive)
Before the next step, locate a USB flash drive with at least 8GB that you’d like to use for the install files. Insert the flash drive into the PC running the Windows 10 Media Creation Tool, and format the drive.
Once your drive is installed and formatted, select “Create installation media” and click “Next”
Let’s Create a Bootable USB Windows 10 Installer
Select “USB flash drive” as the desired media to use, click “Next.”
Select the USB flash drive that you formatted as the removable drive to install the Windows 10 files to.
At tthis point the Windows 10 installation files will begin downloading and the USB flash drive will be formatted again (the Windows 10 Media Creation Tool will make the flash drive bootable). This process can take some time as the Windows 10 images will be downloaded.
Once the process finishes, close the software and eject the newly created, bootable, Windows 10 USB flash drive.
Step 3 – Install Windows 10
Power off the PC that you’d like to install Windows 10 to (this can even be the same computer you just used to create the install media), and insert the Windows 10 USB flash drive.
- NOTE: If the PC is already licensed for Windows 10, the license will reactivate after re-installing Windows. If you are installing on a PC that does not have a Windows 10 license, if you are building a PC for example, you will need to purchase a Windows 10 license.
Power on the PC, and get into the boot screen by holding the key appropriate for your manufacturer (typically DEL, F2, or F12).
Select the Windows 10 USB flash drive as the boot target.
Follow the prompts to install Windows 10 on your desired partition.