
How to Edit the Windows Hosts File
Editing the Windows Hosts File Allows you to manually control DNS resolving on Your Local PC
When you type a domain name into a browser window, your PC domains a DNS lookup request to see what IP address that domain resolves to. For example if we ping google.com, we see that it resolves to the public IP address of 142.250.217.78. But Windows has a built in way to overwrite the DNS lookup that you’d normally get. The secret to overwriting the DNS lookup lies in a small text file called the Windows hosts file. By changing the IP that your local device resolves a domain to, you can view websites and servers, that may not be live yet. This can be especially useful if you want to preview a website or server, without actually changing any public or global DNS settings.
Opening the Hosts File
The first step in editing the Windows hosts file is to launch notepad as an Administrator. Press the start button in the lower left hand side of the Windows desktop (or just use the Win key), and search for the application “notepad.” If there is no search bar, you can right click the Windows icon and select “Search.” Right click the notepad application and select “Run as Administrator.”
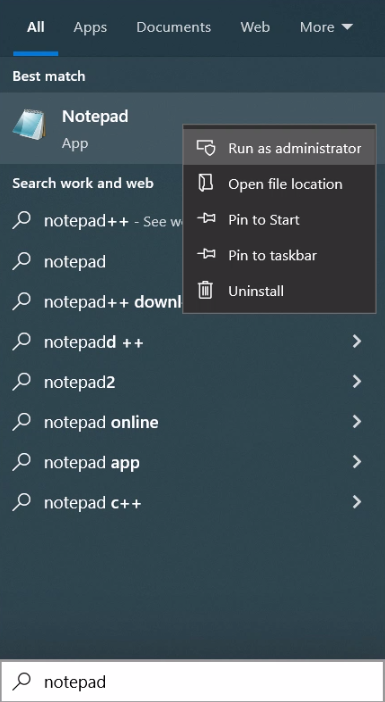
Launch Windows Notepad App as an Administrator
Once the app is open, Click “File,” then “Open.” Navigate to the following Windows Directory. The path can be copy and pasted into the File Explorer search bar on top of the dialog box.
Since this is a system file, you will likely not see it, or any files listed to open. You’ll need to toggle the file types drop down menu in the bottom right of the dialog box from “Text Documents (*.txt)” to “All Files (*.*).” You should now see the it listed, click on it and select “Open.”
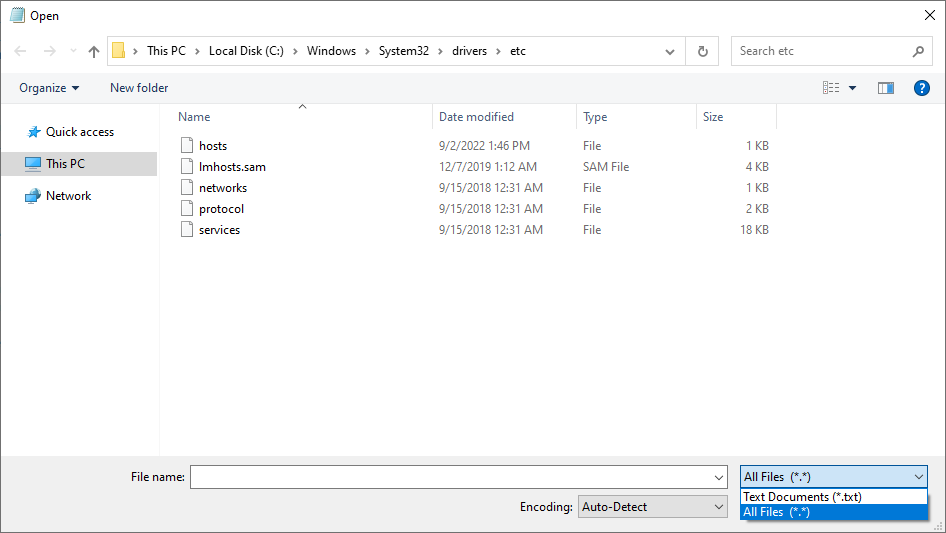
You’ll need to select “All Files (*.*)” to see and open the hosts file
Editing the Hosts File
The default hosts file will have some instructions and examples, but all of the lines will be commented out (ignored) with the “#” symbol. Below the instructions, is where you can go ahead and add the info to overwrite your local PC’s DNS lookup. The syntax is simply, ip-address domain-name. For example, if we want google.com to resolve to 10.10.10.1 instead of it’s normal IP, we can enter the following line to the end of default text.

Adding a line to the hosts file to bypass normal DNS lookup
Save the file, and you PC will start resolving your domain to the IP address given. You can verify that it is working by pinging the domain name you are working with. For example, normally if we ping google.com, it will resolve to 142.250.217.78. After adding the line in this example to the hosts file and saving it, we see that it is now resolving to 10.10.10.1. Note that the IP address you use does need to be pingable to verify that it’s working this way.
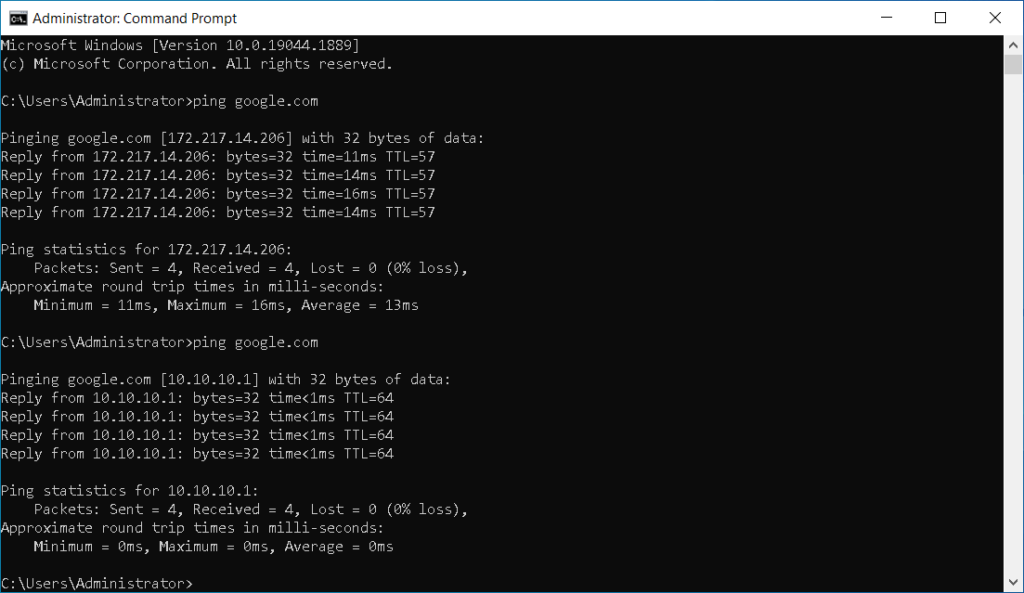
Ping before and after changing the hosts file
Why it Matters
In this example, we edited the Windows hosts file to resolve to a local IP address (10.10.10.1). The same works for public IP addresses as well. Changing the hosts file can essentially act as a DNS A record for your local device, allowing you to view a server that might not have a public DNS record in place. This means that you can point to (or preview) a dev site, or a migration, or a new server install, without having to make it publicly viewable – a very handy tool to keep in the toolbox.