Increase Stability of your AWS Lightsail WordPress Instance by Adding a Memory Swap File
We’ve seen an issue with WordPress running on AWS Lightsail, which looks to be addressed by adding a memory swap file to the Linux environment. If your WordPress instance is becoming unresponsive, it may be due to a memory shortage and adding a swap file can help alleviate this bottleneck.
We’ve seen this complaint on a number of higher traffic websites. We also know that there are a number of mentions of this issue in the AWS forums, such as this one, and elsewhere on the internet. This guide describes the process of adding an 8GB memory swap file to the AWS Lightsail environment running the Bitnami WordPress package, but the same process can be followed for any Linux server that may need the extra resources.
Purchase Additional Storage and Assign it to your Lightsail Instance
The first step in creating the swap file for your AWS Lightsail WordPress Instance is purchasing an additional storage block. The smallest storage block offered is 8GB. At the time of writing, this storage will cost about $.10/month.
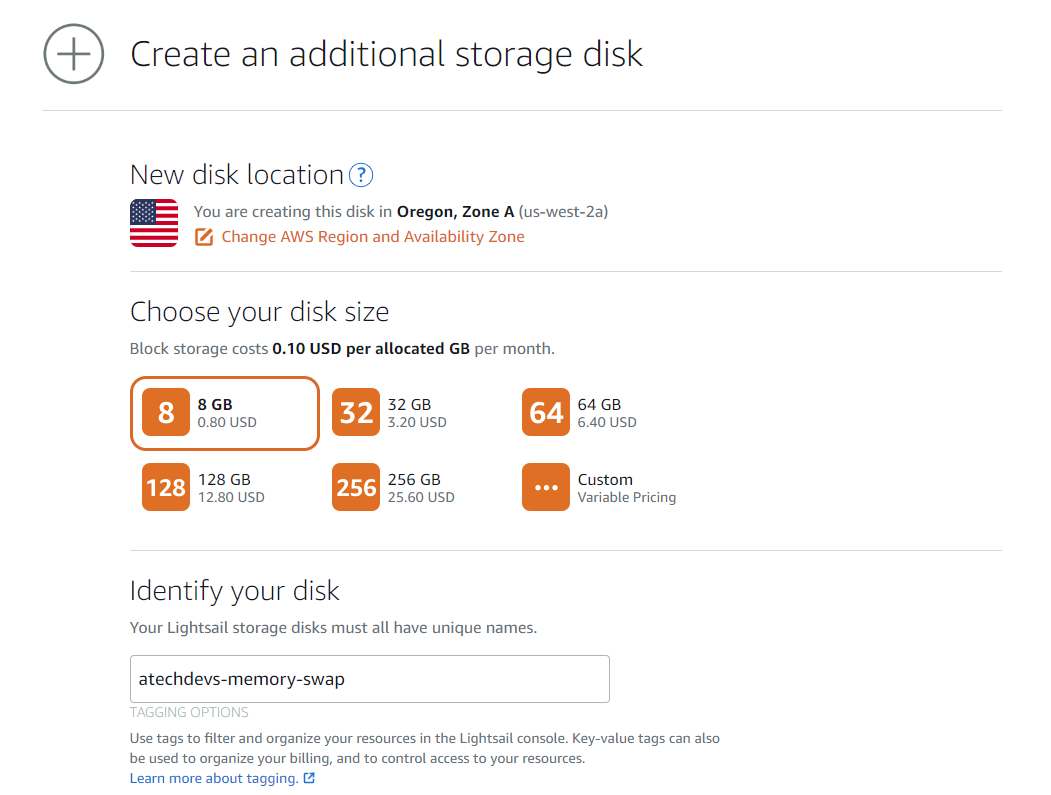
To add the block storage in Lightsail, navigate to “Storage” and select the button “Create disk.”

Add 8GB of block storage in AWS Lightsail
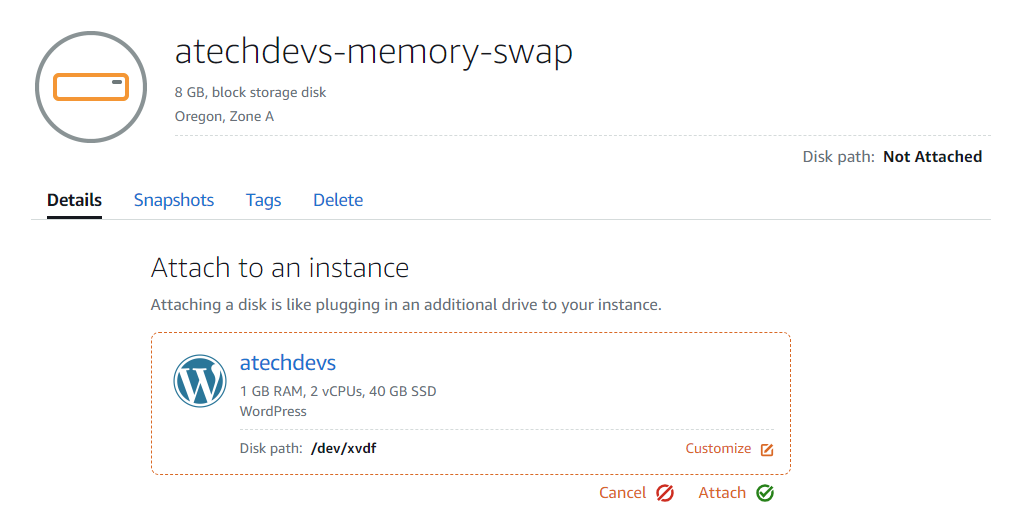
Once you have created the block storage, you will be prompted to attach it to a Lightsail instance. Go ahead and select your instance that you want to attach it to. We will be adding to our instance called “atechdevs.”

Attach block storage to your instance
Upon attaching the block storage to your instance, the new disk path will be displayed (/dev/xvdf in our example). You will also get a friendly reminder to mount and format your new disk, which will bring us to the next step.
Partition and Prepare Storage
Before formatting the disk, use the following commands to confirm the disk status.
List all of the disks:
Check disk state:
Connect to your instance using the bowser based SSH client and run the commands to check the disk.

Use “lsblk” to identify the disk to be used for memory swap
Here we see our 8GB of block storage listed as the disk “nvme1n1.”
Next we will use the utility “fdisk” to format the partition and prepare the disk to be used as a memory swap file. Run “fdisk” on the disk identified in the previous step.
The fdisk utility will launch for our selected disk and give a prompt. Enter in the following commands/syntax.
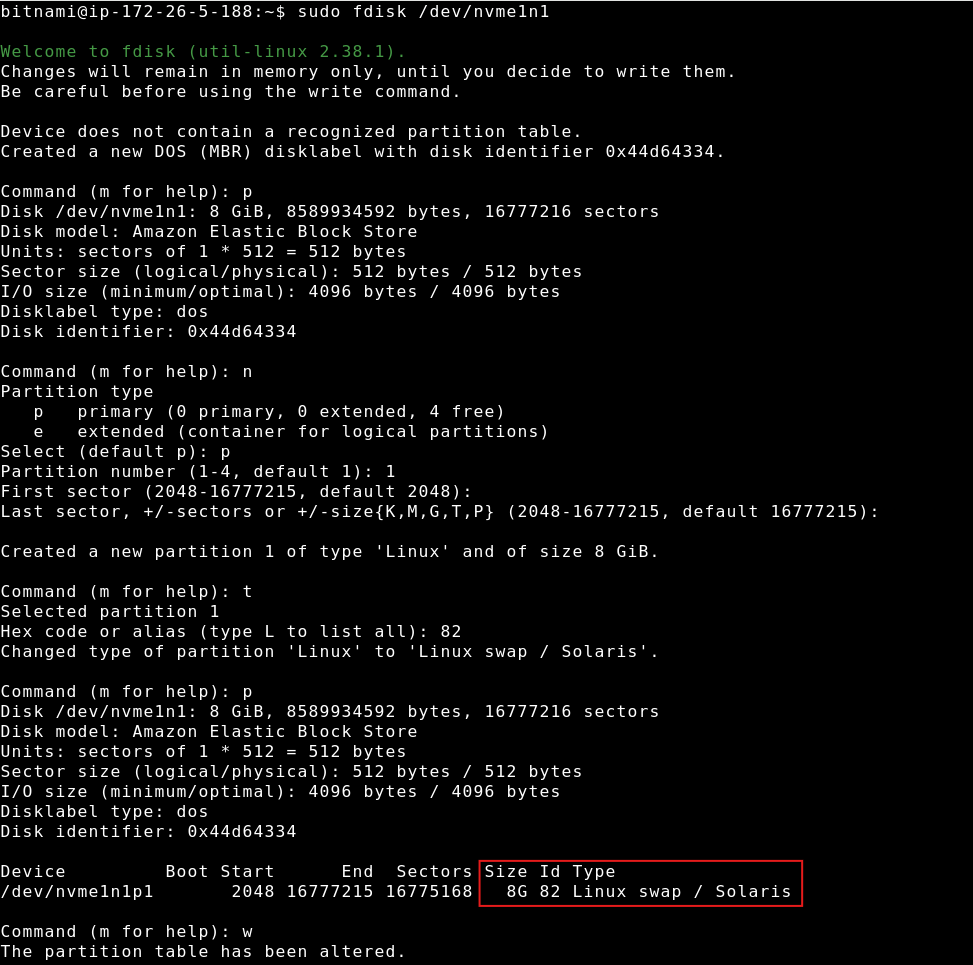
The following screenshot shows the fdisk utility being launched and the new memory swap partition being created.

Use the fdisk utility to partition the disk for memory swap
Notice that the second time the “p” command is used to print the partition table, we see that the type has changed to Linux swap. We are now ready to activate the memory swap in the next step.
Set Up the Linux Swap Area (Partition) and Make it Persistent
The next step is to use the mkswap command to tell the Linux operating system to use the partition we made in the previous step as the swap file.

Use the mkswap command to set the memory swap file
Note the UUID that is shown in the output of the mkswap command. In our case it is UUID=3d981622-abed-4ee1-b393-db2532883ca6.
Now we will back up and then edit the fstab file to make the memory swap file persistant.
Backup fstab file:
Once the file is backed up, edit the fstab file.
Add the following line to the end of the fstab file.
 Add the line to the end of the fstab file and write it with ctrl+O. Exit with ctrl+X. Adding this line will make the swap file created in the previous steps persistent.
The last step is to activate the swap file with the swapon command.
Verify The Swap File and Check Usage
To verify that the swap file is activated, use the “swapon” command with the “–show” switch.

Another handy command for verifying that the memory swap file is in use is the “top” command, which will show system resource usage.

Output of the “top” command showing the memory swap file
We’ve found that adding the memory swap file to and AWS Lightsail instance running WordPress greatly increases the server stability and memory related issues. This same process can be followed for any Linux server, though the first step of adding the block storage would be different as that is proprietary to AWS Lightsail.