Allowing Ping on Windows PCs
By Default Windows PCs will not Respond to Ping Requests without a Firewall Rule
ICMP ping is one of the most useful tools for network and systems administrators, but by default Windows does not allow ping echo requests in. Adding a simple rule to Windows Defender Firewall with Advanced Security will allow your PC to receive and respond to ping requests.
Here are the steps for adding the firewall rule in Windows 11.
Adding the Firewall Rule
In Windows 11 navigate to Start > Settings > Privacy & security > Windows Security > Firewall and network protection > Advanced Settings. This will bring you to the Windows Firewall where you can manage, add, and remove firewall rules.
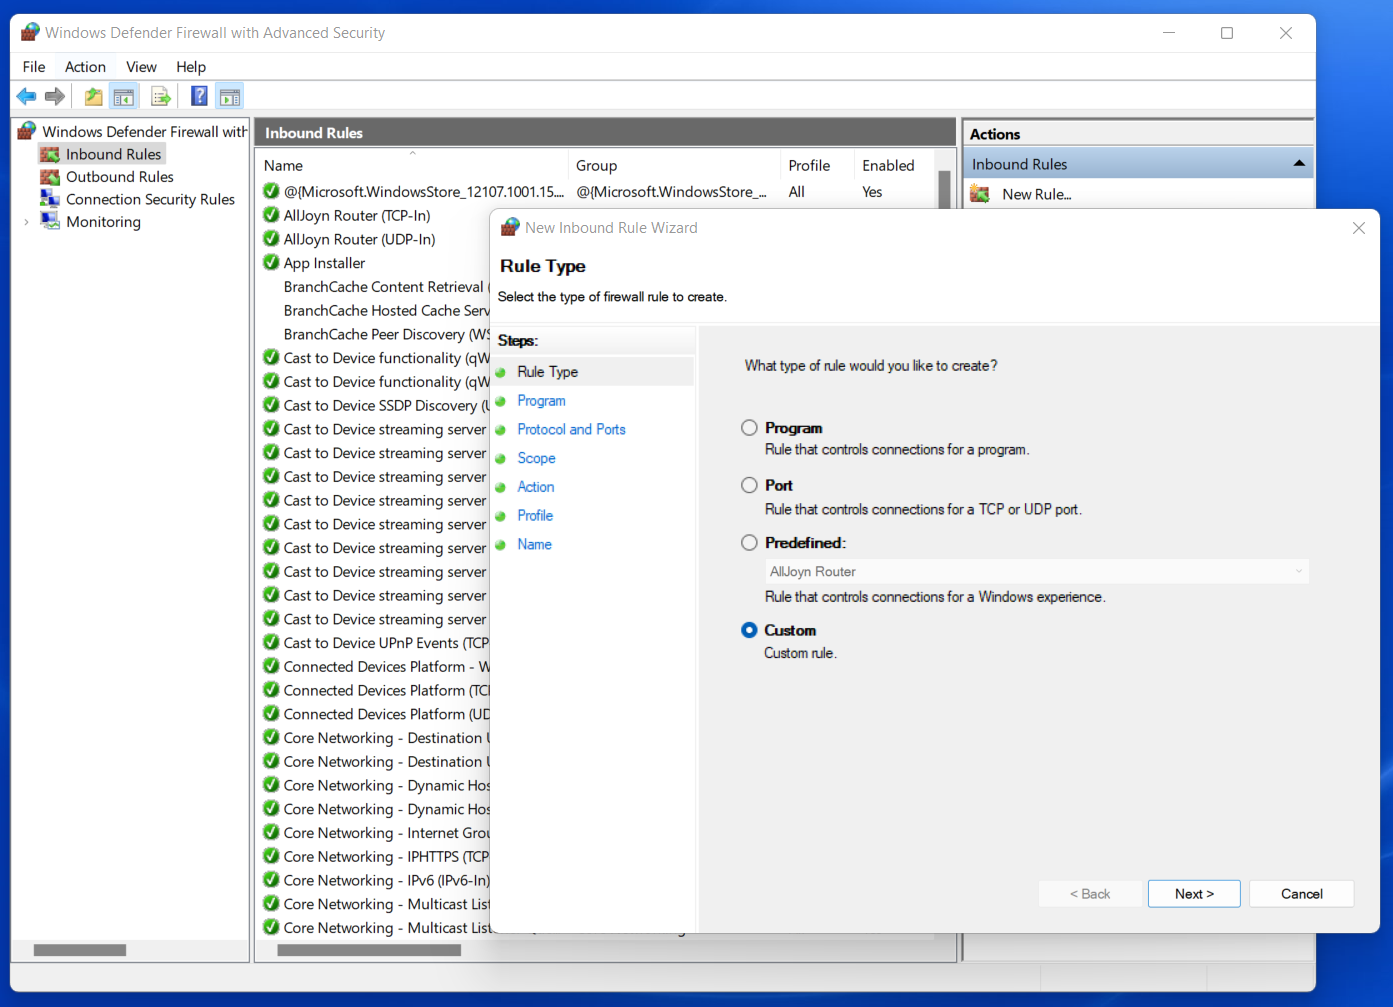
Click the “Inbound Rules” tab on the left hand side of the window and then “New Rule” under the Actions section on the right. This will open the New Inbound Rule Wizard.

Create a new inbound rule to allow ping requests in
On the Rule Type tab, select “Custom” rule and click Next.
On the Program tab, select “All Programs” and then click Next.
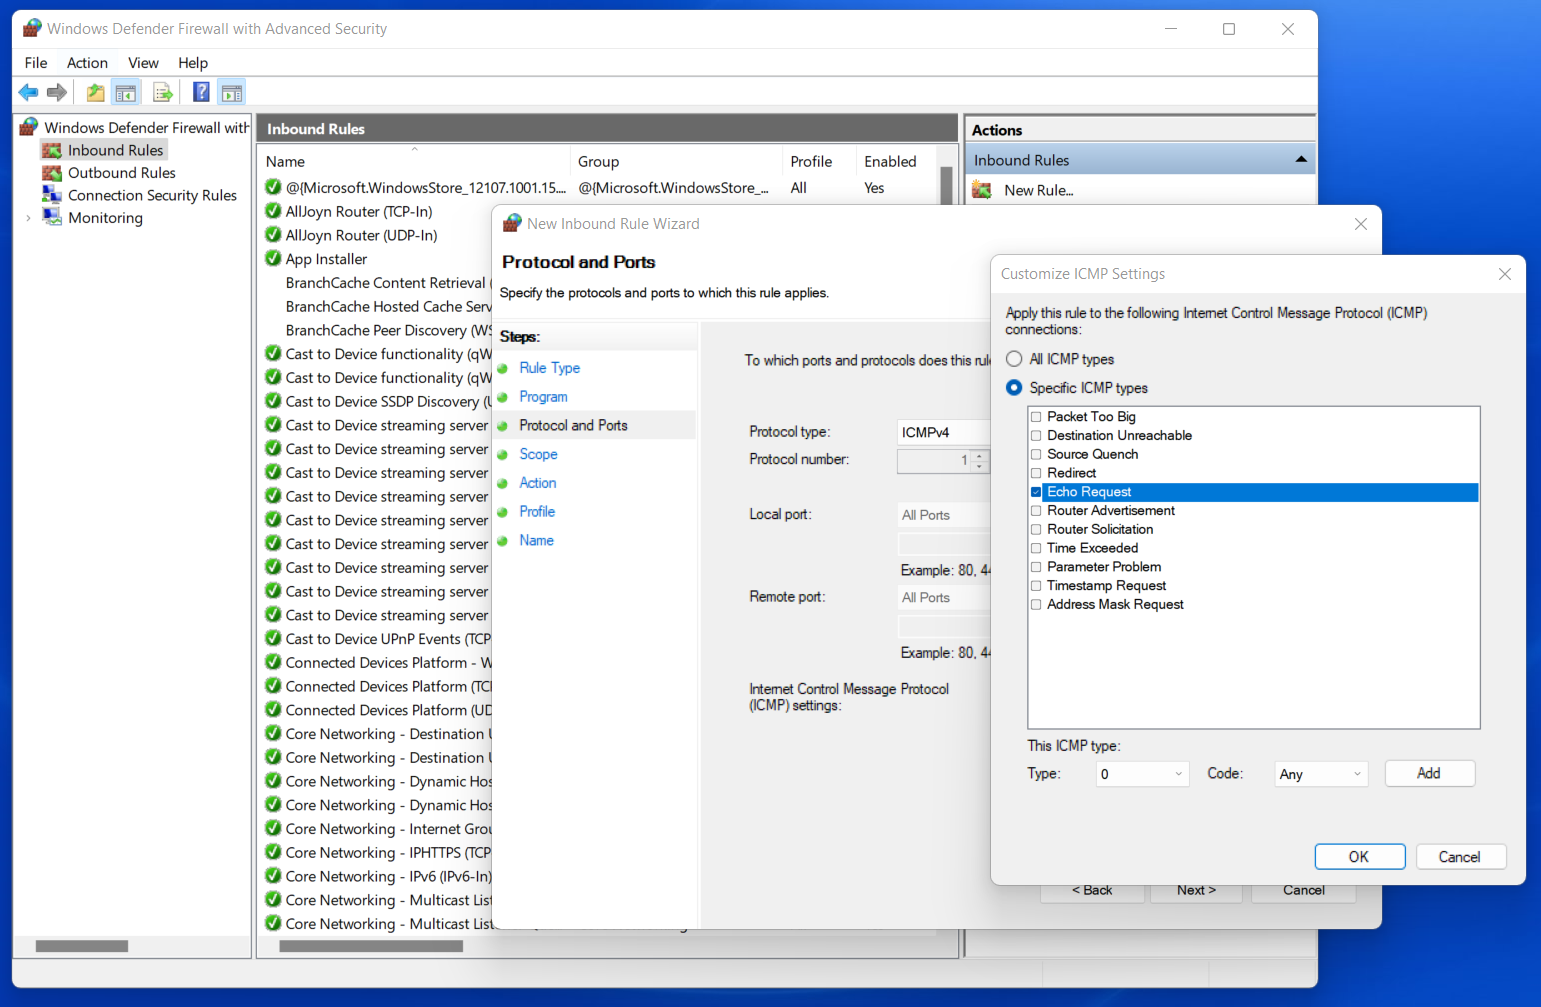
On the Protocol and Ports tab, under “Protocol type:” use the drop down to select “ICMPv4,” then next to “Internet Control Message Protocol (ICMP) settings:” select “Customize ….” This will open a new window where you can specify which ICMP types the firewall rule considers. In the dialog box, select “Specific ICMP Types” and check “Echo Request,” select OK then click Next.

Select Echo Request as the ICMP type for this firewall rule
On the Scope tab, leave “Any IP addresses” selected and click Next.
On the Action tab, select “Allow the connection” and click Next.
On the Profile tab, select all profiles or narrow it down if preferred. Click Next.
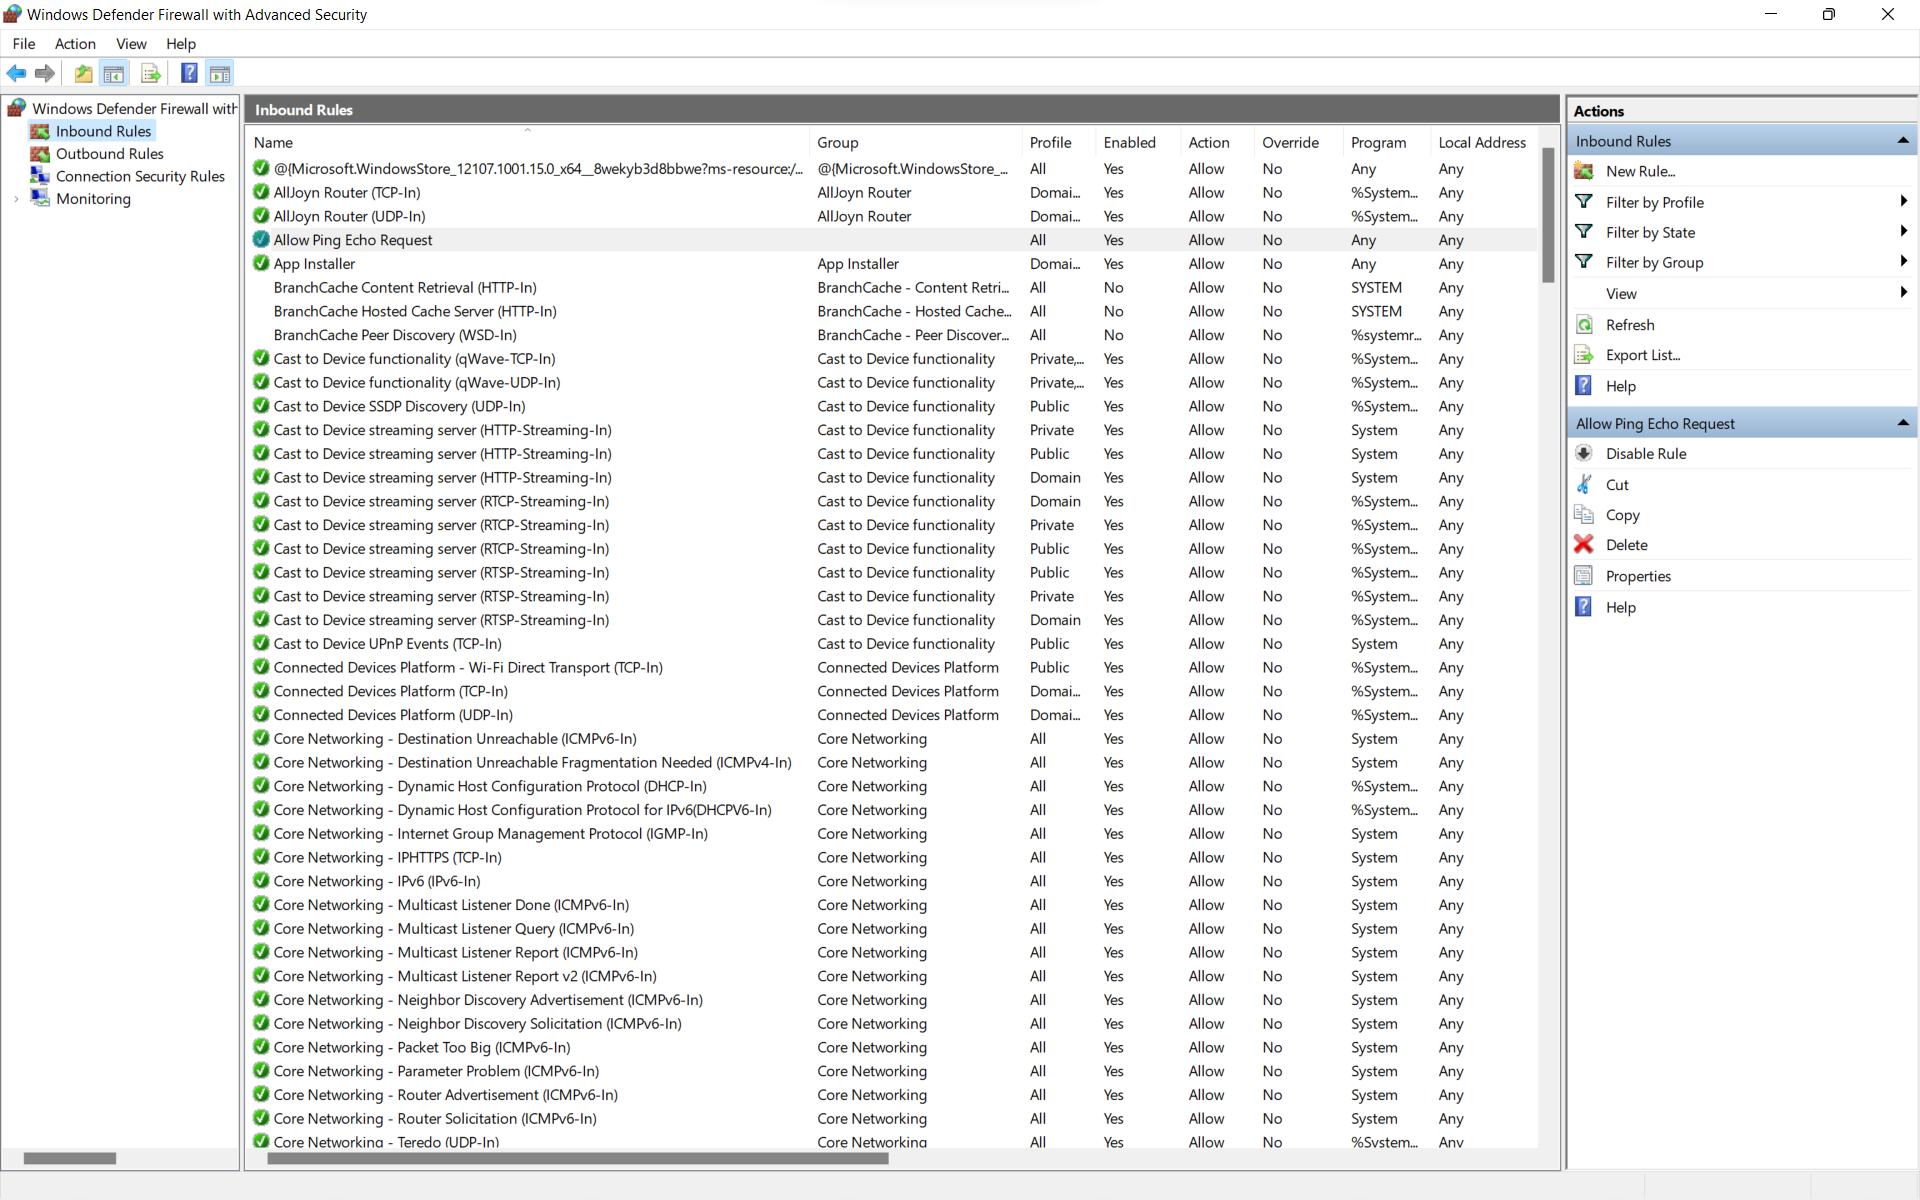
Give the rule a descriptive name such as “Allow Ping Echo Request” and click Finish.

Windows Firewall rules showing the new “Allow Ping Echo Request” rule
The rule will be enabled by default when it is created, and the Windows 11 PC will now respond to ping requests.
Thanks!